Baking helps

0

Saturday, March 19, 2011

It's no secret that I love King Arthur Flour, so naturally I'd love to have these on my cookbook shelf- also I think this batter dispenser is a great idea and would be quite handy.

Lucky

0

Thursday, March 17, 2011

Happy St. Patrick's Day!
I hope you are having a lovely day
and that you didn't forget to wear green :)

Can I just say that I feel extremely lucky & glad that I've made it to this point in the semester?! I just finished a 6 hour midterm and sat through class until 8:30pm yesterday evening. Today is a more relaxed day (thankfully)... a trip to the gym, class, work and home by 5:00pm. Hooray for short days! I can't believe we've only got about 20 days of school left. Where did the time go? There's a lot of things I need to do before graduation, but I'm looking forward to all of the festivities, adventures and R&R that summer will bring. 

Lucky Charms bars

0

I made these fun little toppers for my Lucky Charms bars. They'll be perfect little St. Patrick's Day gifts, and they only took about 5 minutes to make. You can  just drag off the topper and print it. It will be already the correct size for your standard treat bag (or adjust it to fit a sandwich bag). You can find the recipe for the bars below-


Lucky Charms Bars
3 tbsp. butter
4 c. miniature marshmallows
5 c. Lucky Charms cereal

DIRECTIONS:

Grease 8x8 or 9x9 pan. Microwave butter and marshmallows on high in bowl for 1 minute, stir, microwave 1-2 more minutes until melted and smooth (be careful not to overcook, it only took about 45 seconds more in my microwave). Stir in cereal until well coated. Press in pan. Allow bars to cool for 30 minutes (you can toss them in the fridge or freezer for speedy cooling).

{yields approximately 16 bars}

Clover pin-on

0

Tuesday, March 15, 2011

This little felt pin-on was really easy to make. I just drew out a pattern of what I wanted it to look like on a plain piece of printer paper. Then I cut it out and pinned it to one layer of felt. Next I cut out two layers and then prepared them to be hand sewed. I placed a little batting in between the layers and then used a blanket stitch to join them. Finally, it was just a matter of finding something to attach it (temporarily) to a jacket or shirt. I didn't want to pay for pin-backs so I just used a standard safety pin.

St. Patrick's Day {prints}

1

Sunday, March 13, 2011

I made these 5x7 prints just for you! They make perfect little note cards for your boss, co-worker, friend, roommate, spouse or child. Just drag them off and they're ready to print!

Festive recipes

0

Saturday, March 12, 2011

I'm never a big fan of recipes that take all day to prep and make. So I threw together a little collage of quick and easy recipes that are perfect for St. Patrick's day. Below the collage you'll find the links to the recipes-

Clover Garland

0

Friday, March 11, 2011

Garland is such an simple and easy way to decorate for the holidays. I used the Edison machine at Archivers to cut out the clovers and then took them home and sewed them together.

Button Necklace

0

Thursday, March 10, 2011

I made this necklace in a matter of minutes. I love fast, cheap and cute crafts, and this definitely fits into all three categories. I picked up these green vintage buttons at Archivers and the thread at JoAnn's. Then it was just a matter of stringing them on and securing the ends. I'm not sure if I'd use the same thread next time, but I think I got the look I was going for.


Kid friendly

0

Wednesday, March 9, 2011

What's more Irish than potatoes? Probably a lot of things, but hey, I thought to myself, I've always seen people carve really cool things out of them so why not give it a try. First of all, its a lot harder than it looks... especially curves. Second, you need an X-ACTO knife or a really sharp kitchen knife with a small tip to cut with. But other than those little details, it's a pretty fun little project. I used some acrylic paint I had around the house and dipped the 'stamp' in it. It's perfect to do with your kids (once you've cut the potatoes). They can even finger paint around the stamps. Cut them out or mount them and you've got stationary and artwork.

Pots of gold

0

Tuesday, March 8, 2011

I needed something creative to give to friends and visiting teaching sisters, so I came up with this idea. I made the label in Illustrator and then printed & cut them out. I then stuffed the bottoms of each of the pails with paper easter grass, making sure it was nice and compact. Finally, I poured Nuggets and Rolos in... allowing enough room for the lid to fit tightly.

Taste the rainbow

1

Sunday, March 6, 2011

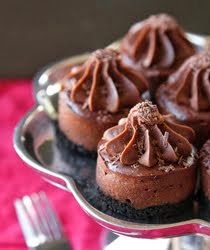
My mom sent me an email a couple weeks back of a rainbow cake. I thought it was pretty neat. So I decided to go out and make mini versions of it. This is the end product: pretty cute, huh? Check out the recipes below... even if you don't decide to do colored cupcakes, they're definitely worth trying!!!


Colorwheel Cupcakes
1 Betty Crocker french vanilla cake mix
2  large eggs
1 c. Daisy light sour cream
1/2 c. milk (I used 1% because it's what I had on hand)
1/2 c. vegetable oil

DIRECTIONS:
First: Combine all ingredients until incorporated (beat for about 30 seconds). Scrape sides of bowl and then beat on medium high speed for about 2 minutes. Divide batter accordingly to how many colors you are using. Use food coloring to color batter to desired intensity (Wilton gel colors work best). To get a layered stripe, put a spoonful of each color in the cupcake one at a time. The batter is thick, so it won't spread on its own. You can set aside a bowl of water & dip your finger in. It will help you to spread the batter out without it sticking to you.
 Second: Use package/box directions to bake. Check with toothpick, when it comes out clean they're ready! Cool on a rack for 20-30 minutes before frosting.


Melt in Your Mouth Cinnamon Frosting
1 c. butter
3 tsp. whole milk (I used 1% and it turned out just as tasty
4 c. powdered sugar
1 tsp. vanilla extract 
1 tsp. cinnamon (King Arthur Flour's Vietnamese cinnamon is perfect for this!)

DIRECTIONS:
First: make sure butter is at room temperature. Then beat on a high speed for 3 minutes until creamy. Next add sugar one cup at a time. Add milk one teaspoon at a time. Once incorporated, add vanilla and cinnamon. Beat on high for 5 minutes.
 Second: Use a rubber scraper (spatula) to scoop into a piping bag (if you don't have one, a Ziplock bag works great). Once in the bag, cut the tip (or corner) to create an opening. Then pipe onto cupcakes in a circular motion starting at the outside working in. Decorate with sprinkles, marshmallows or whatever candies you prefer!

{One batch makes enough to frost 24 cupcakes}

Life Made Simple All rights reserved © Blog Milk - Powered by Blogger