Heath Bar Cupcakes

0

Saturday, March 31, 2012

One of my favorite candies at Christmas is California Toffee Brittle from See's. I could probably eat a half pound in a day or two, no joke. But..... since we live so far away from a See's store, the next best thing is a Heath Bar. This afternoon I opened the refrigerator and was happy to find one in the door.  Unfortunately one bar doesn't go very far (at least if you're me), so I chopped it up and made cupcakes with it. The cupcake itself is filled with flecks of baking bits which help to give it a nice buttery toffee flavor. They're topped with a chocolate buttercream and then rolled in Heath Bar chucks. All I can say is that they will definitely satisfy any toffee (or chocolate) craving! Yum!

Heath Bar Cupcakes
Ingredients
¾ c. unsweetened cocoa powder
1½ c. all-purpose flour
1½ c. granulated sugar
1½ tsp. baking soda
¾ tsp. baking powder
¾ tsp. salt
2 large eggs
¾ c. warm water + 1/8 tsp. espresso powder
¾ c. buttermilk
3 tbsp. canola oil
1 tsp. vanilla
1/4 c. Heath English Toffee Baking Bits

Chocolate buttercream frosting:
6 tbsp. unsalted butter, melted
½ c. unsweetened cocoa powder (natural, not Dutch-process)
¼ c. milk
2¼ c. confectioner’s sugar
½ tsp. vanilla extract
1 tsp. light corn syrup (optional)
Pinch of salt

1 Heath Bar, chopped (for garnish)

DIRECTIONS:
1. Preheat oven to 350 degrees. Line 1 cupcake pan with liners, set aside.
2. In a medium size mixing bowl, whisk or sift together flour, cocoa powder, sugar, baking soda, baking powder, and salt.
3. In the bowl of a stand mixer, add eggs, warm water w/ espresso powder, buttermilk, oil, and vanilla. Mix on medium speed until smooth. Turn down speed to low and slowly add the dry ingredients to the wet mixture. Mix until smooth (no flour/cocoa pockets remain), about 3 minutes. Remove bowl from stand and fold in toffee baking bits.
4. Divide batter evenly among cups, filling ⅔ of the way full. Place in oven and bake for 20-21 minutes, or until the tops spring back when touched and a cake tester comes out clean. Be careful not to over bake!
5. Remove from oven, allow them to sit for 3-4 minutes in the pan, and then transfer to a wire rack to cool. Prepare frosting, pipe and top with chopped Heath Bar chunks.

For the frosting:
1. In a the bowl of a stand mixer (with whisk attachment), beat the melted butter and cocoa powder powder until smooth.
2. Mix in the milk and powdered sugar, beating on medium speed to spreadable consistency (add an extra splash of milk if necessary, but frosting should be fairly stiff).
3. Add vanilla, light corn syrup, and pinch of salt. Beat for 20-30 seconds until light and fluffy
Stephen + Natalie | Makes approximately 12 cupcakes

Browned Butter Banana Bread

0

Tuesday, March 27, 2012

My mother-in-law sent us home this weekend with some spotted bananas. There are really only three ways I'll eat bananas. Plain, in bread and in cookies. Since we planned on making frittatas for dinner, I decided to bake a loaf of browned butter banana bread to go along with our "breakfast." I love how crusty the tops of this gets and how moist and sweet it is inside. To make it more of a dessert, you can add chocolate chips or cocoa powder to the batter. Enjoy!

Browned Butter Banana Bread
Ingredients
2 c. all-purpose flour
3/4 c. brown sugar
8 tbsp. (1 stick) butter, melted and browned
1 tsp. baking soda
1/4 tsp. salt
3/4 tsp. ground cinnamon
2 large eggs
1 1/4 tsp. vanilla extract
1/4 c. buttermilk (or plain yogurt)
1 1/4 c. (3) bananas, mashed
(optional: 1 c. chocolate chips, 1/2 c. cocoa powder, 1/2 c. chopped walnuts)

DIRECTIONS:
1. Preheat oven to 350 degrees. Grease (with Pam or butter) and flour one 9x5 inch loaf pan.
2. In a saucepan over medium heat, melt butter. Once butter begins to bubble and crackle, the butter will begin to brown. As the butter cooks, swirl to move butter around. When the butter smells nutty, remove pan from heat and transfer to a small bowl. Set aside to cool.
3. In a medium bowl, combine eggs, vanilla, buttermilk and cooled butter. Gently whisk.
4. In a large bowl, combine flour, sugar, baking soda, salt and cinnamon (cocoa if desired). Whisk.
5. Add wet ingredients to the dry ingredients. Using a spatula, stir together, making sure to mix in all possible pockets of flour. Fold in mashed bananas (nuts or chocolate chips if desired). Stir, being careful not to over mix.
6. Pour batter into prepared pan. Place in oven and bake for approximately 1 hour, or until a cake tester inserted into the center comes out clean.
7. Remove from oven and place onto a wire rack. Allow to cool in pan for 20 minutes before inverting onto the wire rack. Cool for an additional 30 minutes before serving.*
*To store: wrap in plastic and keep at room temperature for 3 days or freeze.

Spicy White Chicken Chili

0

Tuesday, March 20, 2012

Stephen and I love chili. We make three bean chili a couple of times a month. But sometimes you've just got to change things up. Right? So I originally saw this recipe on Pinterest, and then my friend Mandy made it and loved it, and that is when I decided we needed to give it a try. As usual, I altered things a bit. Since we are both big fans of heat, we spiced things up by adding some cayenne pepper and jalapenos. I topped mine off with some some jack cheese, lime and cilantro, and Stephen scooped up whatever was left at the bottom of his bowl with tortilla chips. Makes a perfect "light" chili.

Spicy White Chicken Chili
Ingredients
1 tsp. extra virgin olive oil
1 medium onion, diced
1 clove garlic, minced
1 (14.5 oz) can of corn, drained
1 (4 oz) can green chilies
1/2 (4 oz) can jalapeno peppers
1/2 tsp. cumin
1/2 tsp. coriander
1/2 tsp. oregano
1/4 tsp. cayenne pepper
1 (32 oz) box chicken broth
2 c. cooked chicken, shredded
2 cans great northern beans, drained and rinsed
1 can white kidney beans, drained and rinsed
salt and pepper to taste
{Garnish with cilantro, shredded Monterey jack cheese, or lime juice}

DIRECTIONS:
1. Rinse and drain beans and corn, set aside.
2. In a large pot set over medium-high heat, add olive oil. Add onion and garlic once oil becomes hot. Saute until soft (about 3-4 minutes). Add chilies, jalapeno peppers and corn. Season vegetables with salt and pepper. Add cumin, coriander, oregano, cayenne pepper and continue to saute for 1 more minute. 
3. Pour chicken broth over vegetables. Bring to a simmer. Add beans, cover and let simmer for 20 additional minutes. 
4. Once stock has simmered, add shredded chicken and season with salt and pepper. Allow to simmer for 10 additional minutes. 
5. Garnish and serve as desired.
Stephen + Natalie | Makes approximately 4-6 servings

Chocolate Sugar Cookies

0

Saturday, March 17, 2012


St. Patrick's Day treats are always tricky for me because Stephen isn't a huge fan of mint and I don't like dumping a whole bottle of green food coloring into treats. So when I stumbled across some St. Patrick's Day cookie cutters, I knew exactly what to make. Chocolate sugar cookies. These cookies are really easy to prepare and they come out of the oven smelling delicious and looking absolutely perfect. Oh, and they taste pretty darn good too. As far as frosting goes, you can use royal icing if you're into the flooding technique or just a standard icing (with a bit of butter for softness and creaminess) if you're wanting to pipe it on or use a knife to spread it around. Happy St. Patrick's Day!

Chocolate Sugar Cookies
Ingredients
1 c. butter, room temperature
1/4 c. shortening
1 1/2 c. granulated sugar
2 eggs
1 tsp. vanilla
1 tbsp. warm water + 1/4 tsp. espresso powder (diluted)
1 tsp. salt
3/4 tsp. baking powder
2/3 c. cocoa
3 1/2 c. all-purpose flour

DIRECTIONS:
1. Preheat oven to 375 degrees.
2. In the bowl of a stand mixer, on medium-hight speed, beat butter, shortening and sugar until light and fluffy.
3. Add one egg at a time, mixing after each addition until incorporated. Then add vanilla. Mix.
4. Add baking powder, salt and espresso mixture and cocoa. Mix on a low speed until combined.
5. Gradually add flour. Mix until combined.
6. Working with one fist-sized ball at a time, roll out flat on a floured surface (the thickness will depend on preference, I prefer 1/4" thick or a bit thinner). Cut out shapes. Place onto sheets and bake for 6-8 minutes.
7. Remove from oven and let cool on sheets for 2 minutes.
8. Transfer to a wire rack to cool completely. Frost and decorate as desired.*
Adapted from LilaLola- The End-All Chocolate Cookies Recipe | Makes approximately 2-3 dozen, depending on shape and size

Past St. Patrick's Day Projects

0

This past week has been a little weird to say the least. Stephen is off school and I've had 3 classes and Cub Scouts this week. I guess were switching things up? Along with the schedule change I've been trying to spring clean, finish sewing projects and shoot/edit photos for homework. Needless to say, I'm feeling a little worn down. I thought spending an afternoon at the beach would be the cure, but things have only worsened since then. Maybe it's the warmer weather + pollen + wind (allergies perhaps?). I don't know. I've just been tired and with the usual sore throat stuffy nose. So unlike last year and all of it's St. Patrick's Day crafty gloriousness... this year I made cookies. And that is it. Sorry to disappoint. However, if you need some inspiration, I put links to past projects, so check them out.

Happy Pi(e) Day!

0

Wednesday, March 14, 2012


1. Pie pop with tutorial via Bakerella
2. Peanut butter and chocolate whoopie pies via Williams-Sonoma
3. Peanut butter banana cream pie with hot fudge sauce via Annie's Eats
4. Mini peach pies via Williams-Sonoma
5. Mini Chicken and artichoke pies via Martha Stewart
6. Mini muffin tin cherry "cutie" pies via Bakerella

Now go bake a π!

Fudgy Cocoa Brownies

3

Tuesday, March 13, 2012

Wednesday afternoons I try to make some kind of treat to go along with the activity I've planned for my Cub Scouts. Keeping in mind that whatever I make has to be kid-friendly, I usually make something with peanut butter or chocolate. I hadn't made brownies in a while, so I thought I'd give them a go. These brownies are so easy to make. Most of the work is done in the microwave, but the best part is that they only bake for 30 minutes, unlike most boxed mixes that can take up to 45 minutes. When they're done, they come out fudgy, with intense chocolate flavor and have a crisp and crinkled top. I'm sure this will become your go-to brownie recipe... it is mine!

Fudgy Cocoa Brownies
Ingredients
10 tbsp. butter
1 1/4 c. sugar
3/4 c. unsweetened cocoa powder (regular or Dutch-process)
1/4 tsp. salt
3/4 tsp. vanilla extract
1/8 tsp. espresso powder
2 large eggs
1/2 c. + 2 tbsp. all-purpose flour
1/2 c. chocolate chips
1/8 c. mini chocolate chip morsels (to sprinkle on top)
1/2 c. chopped walnuts (optional)

DIRECTIONS:
1. Preheat oven to 325 degrees. Line an 8x8 square pan with foil, leaving an overhang on two sides (you will pull them out of the pan this way).
2. In a medium heatproof bowl, combine butter, sugar, cocoa, espresso powder and salt. Microwave on high for approximately 1 minute and 30 seconds. Remove from microwave and stir with a spatula until mixture is smooth. It will look gritty but once it cools a bit and add the remaining ingredients, it smoothes out.
3. Stir in vanilla. Then add eggs, one at a time, mixing well after each addition. The batter will become smooth and shiny- this is what you want. Slowly add in flour, mix until it begins to disappear. Beat vigorously by hand for 45 seconds or so.
4. Add regular sized chocolate chips and walnuts. Mix well. Pour into foil-lined pan, spread evenly. Sprinkle mini morsels on top.
5. Place in oven and bake for 30 minutes. Remove from oven and place on top of a wire rack to cool completely (about 45 minutes or so). Lift up the long ends of the foil and remove from pan. Cut into 9 or 16 squares.
Adapted from Smitten Kitchen- Cocoa Brownies | Makes approximately 9-16 bars, depending on how you cut them

Chicken Bacon Alfredo-Ranch Pizza and the BEST DOUGH EVER

6

Friday, March 9, 2012

Last Monday when I was checking out at the grocery store I noticed Bon Appétit's latest issue. As corny as it sounds, the cover really hooked me. You see, I've been searching for about 3 years now for the perfect pizza crust. After probably a dozen failed attempts, I thought I would never ever ever find one that both Stephen and I were satisfied with. Is a non-breadlike dough that produces a crispy crust too much to ask for? I thought so, until I tried this recipe. It's kind of a strange one. In fact, it boggles my mind a bit. Only a 1/4 tsp. of yeast, no sugar, and no kneading, really? And just four ingredients? But I made it, thinking that once again I'd be incredibly disappointed and yet at the same time really hoping it would be amazing, and it was! There's something about the letting the dough ferment for 18+ hours that really makes it spectacular. Plus you can make it ahead and keep it in the refrigerator for up to 3 days.

We made (2) 14" pizzas: a pepperoni one on Monday, and a chicken bacon ranch one yesterday. I was inspired by my former room mate Mandy's recipe over at Baking with Blondie. It reminds me of a pizza from the Brick Oven in Provo. Stephen was really skeptical about the sauce (and probably everything else on the pizza), but he really loved it and so did I! It's a nice break from the norm, and since we ate the whole thing in minutes, I'd say it's a keeper.

Jim Lahey's No-Knead Pizza Dough*
Ingredients
3 1/4 c. all-purpose flour
2 tsp. salt
1/4 tsp. active dry yeast
1 1/2 c. water

DIRECTIONS:
1. Whisk flour, salt and yeast in a medium bowl. While stirring with a wooded spoon, gradually add water, stir until incorporated. Mix dough gently and form into a rough ball. Transfer to a large clean (ungreased) bowl. Cover with plastic wrap and let dough rise in a draft-free area at room temperature until surface of dough is covered with tiny bubbles and the dough has more than doubled in size. This usually takes about 18 hours or so. Transfer dough to a well-floured surface. Shape into a square or rectangle and divide in two. One portion at a time, take the corners and fold under, creating a ball. Dust dough with flour and set aside. Cover with plastic wrap and repeat with remaining dough (at this point you can toss one in the refrigerator in a ziplock bag if you are not going to use it that day or night, remove 2-3 hours before and cover with flour and plastic wrap). Allow dough to rest for 1 more hour.
2. To make the pizza peel, during the last 45 minutes of the dough's resting, turn on your oven to 500 degrees. This way the oven will be hot and ready for the pizza. If you are using a pizza stone, place it in the oven while it is preheating, if you are using a pizza pan or baking sheet you do not have to heat it before hand.
3. Working on a floured surface, dust dough generously with flour. Gently shape dough into a 12"-14" disk, keeping in mind it doesn't have to be perfectly round. The article mentions not using a rolling pin, this forces the bubbles out and makes a really flat hard pizza, so by using your hands and fists, shape it that way. Place onto a floured (or cornmeal/flour combo) baking surface. Top with desired toppings and bake for 5-7 minutes on a pizza stone or 10-12 minutes on a baking sheet or pizza pan. Slice and enjoy!
*Note: this is a half recipe, it makes (2) 12"-14" pizzas

Chicken Bacon Alfredo-Ranch Pizza
Ingredients
1/2 tomato, diced
1/4 onion, thinly sliced
4 strips bacon, cooked and diced
3 chicken tenders, cooked and diced (I seasoned mine with garlic powder, onion powder, pepper and oregano)
1 1/4 c. shredded mozzarella
1/4 c. shredded cheddar
1/4 tsp. oregano
1/4 tsp. red pepper flakes (or more to taste)
pinch of salt and pepper

Alfredo-ranch sauce
1/4 c. heavy cream
1 T. butter
1/4 c. freshly grated parmesan
1 clove garlic, minced
2 tsp. flour
1 tbsp. chicken stock or broth
1/8 c. ranch dressing
pinch of salt
1/8 tsp. ground pepper

DIRECTIONS:
1. To make sauce, in a small saucepan, melt butter. Add minced garlic, stir and cook for 1 minute. Add flour, cook for 1 minute. Add heavy cream and chicken broth, whisk. As mixture thickens, slowly add parmesan, whisk until smooth. Sprinkle in salt and pepper. Remove from heat and let cool for 10 minutes. Add ranch, mix until incorporated.
2. Spread sauce evenly over pizza peel, leaving about 1 1/2 inches around the edge for the crust. Sprinkle shredded cheeses on top. Then place cooked/diced chicken and bacon on top, evenly dividing it. Add raw tomatoes and onion. Sprinkle oregano, red pepper, salt and pepper over entire pizza.
3. Bake for 10-12 minutes at 500 degrees. Remove, let cool for 5 minutes, slice and serve.
Adapted from Baking With Blondie- Garlic Chicken Alfredo Bacon Pizza | Makes approximately 1 (10'-14") pizza

Toasted Coconut Ice Cream with a Fudge Ripple

14

Thursday, March 8, 2012

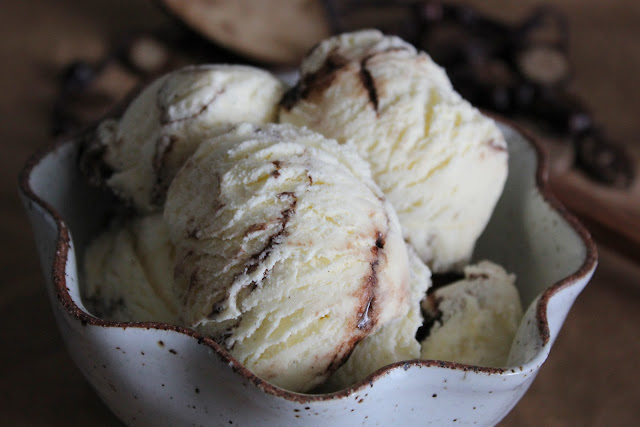
When Stephen and I were on our honeymoon in Mexico, the place we were staying at made the best coconut ice cream. Seriously. I've been wanting it ever since. It finally dawned on me that now that I have my KitchenAid attachment, I needed to try to make it. So I went to my favorite ice cream book (The Perfect Scoop by David Lebovitz) in search of a base recipe and found one. At first I wasn't sure about it. He recommended removing the shredded coconut and that just didn't sit well with me. But I went ahead and followed the recipe, adding and adjusting a few things here and there. The results? Ridiculously good!!! Instead of paring the ice cream with with mango, I opted for a chocolate fudge ripple because in Mexico they topped it with fudge sauce. Oh my, it tasted exactly like it! If you love coconut as much as I do, you have to try this!

Toasted Coconut Ice Cream with a Fudge Ripple
Ingredients
1 c. dried shredded coconut, heaping
1 c. whole milk
2 c. heavy cream
3/4 c. granulated sugar
1/4 tsp. salt
1 vanilla bean, split in half lengthwise (I used 1/4 tsp. ground Tahitian vanilla bean powder)
5 large egg yolks
3/4 tsp. vanilla extract
1/4 tsp. coconut extract 

Fudge Ripple
1/2 c. sugar
1/2 c. light corn syrup
1/3 c. water
6 tbsp. Dutch-process cocoa 
1/2 tsp. vanilla extract
pinch of salt

DIRECTIONS:
1. Preheat oven to 375 degrees. Spread the coconut across the baking sheet and place in oven. Bake for 8 minutes, stirring constantly. Remove from oven when coconut becomes golden brown in color.
2. In a medium saucepan on medium heat, warm milk, 1 c. heavy cream, sugar and salt. Using a whisk, mix until smooth. When mixture slowly starts to bubble, add coconut. Scrape vanilla seeds into mixture or add powder. Cover and remove from heat. Let sit at room temperature for 1 hour (this will build up the flavor- it is an essential step, so don't be tempted to cut the time short).
3. Meanwhile, to make the fudge ripple, whisk together sugar, corn syrup, water, cocoa powder and salt in a medium saucepan. Place over medium heat, whisking constantly until the mixture bubbles around the edges. Continue to whisk until it comes to a low boil. Allow it to boil for 1 minutes, then remove from heat. Allow to sit at room temperature for 10 minutes, the transfer to a bowl and place into refrigerator to cool completely (it must be chilled throughout so it doesn't melt the ice cream later).
4. After an hour has passed, rewarm the milk and coconut mixture. Set a mesh strainer over a large bowl. Pour warmed mixture over top and strain the coconut-infused liquid through the strainer and into the bowl. Press down firmly on coconut, pressing all of the remaining liquid out. Discard the coconut. Pour the mixture back into the saucepan and place over medium heat.
4. In the large bowl, pour remaining 1 c. heavy cream in it. Again, place mesh strainer over top.
5. In a separate small bowl, whisk egg yolks. Slowly add yolks to warmed mixture, whisk until combined. Stir mixture constantly over medium heat. Using a heatproof spatula, scrape the bottom of the pan until the mixture becomes thick and coats the bottom of the spatula (and reaches a temperature of 170 degrees). Remove from heat and pour over the mesh strainer and into the bowl with the remaining cream. Mix in vanilla and coconut extract. Stir over an ice bath until cool, place in refrigerator to cool completely (30 minutes or so).
5. Freeze according to manufacture's instructions. Remove from ice cream maker and layer fudge sauce and ice cream in an air-tight freezer safe container, taking care not to stir the ice cream and fudge. Chill in freezer for 4 hours before serving.
Adapted from The Perfect Scoop- Coconut Ice Cream | Makes approximately 4-6 servings

Double Peanut Butter Chocolate Chip Cookies

0

Monday, March 5, 2012

You can probably tell by now that we are a little obsessed with peanut butter around here. Ok, so maybe I really mean that I am. Anyway, I was trying to think of something kid-friendly to make for Cub Scouts the other night and thought that these cookies would be perfect. Plus I knew that the leftovers would be gobbled up by the two of us in a matter of hours. These are a great version of a standard chocolate chip cookie and the dough can be made in advance.

Double Peanut Butter Chocolate Chip Cookies
Ingredients
1/2 c. butter, room temperature
1 c. smooth or chunky peanut butter
3/4 c. brown sugar, packed
1/2 c. granulated sugar
1 egg
2 tsp. whole milk
1 tsp. vanilla
1 1/4 c. all-purpose flour
3/4 tsp. baking soda
1/2 tsp. baking powder
1/4 tsp. salt
1 c. chocolate chips
1/2 c. peanut butter chips

DIRECTIONS:
1. Preheat oven to 350 degrees. Line a baking sheet with parchment paper or a silpat mat.
2. In the bowl of a stand mixer, beat butter, peanut butter and sugars until light and fluffy (about 2 minutes on medium-high speed).
3. Add milk, egg and vanilla. Mix until combined.
4. In a separate bowl, combine dry ingredients. Whisk gently. Add dry ingredients to mixture. Gently fold with a spatula until combined (you don't want to over mix).
5. Place dough into refrigerator to chill for 15-20 minutes.
6. Once dough has chilled, using a scoop, make balls, then roll in hands to smooth. Place on sheet 2 inches apart (usually I can get 12 on a standard sheet). Bake for 12-14 minutes, being careful not to overbake. Remove from oven and allow to rest on sheets for 5 minutes before transferring to a wire rack to cool completely.
7. Store in an airtight container in the refrigerator for 2-3 days*.
*If making dough 24 hours in advance: wrap dough tightly in plastic wrap and place into a ziplock bag.

Butternut Squash Bisque

0

Friday, March 2, 2012

A few nights ago I made a butternut squash risotto and found myself with half of a cooked squash left over. I thought about making macaroni and cheese with it but decided instead to make a bisque. This recipe is light, healthy and comes together really quickly (30 minutes or so) if you've already pre-cooked your squash (which is easy... cut it in half, place it in a roasting pan or on a cookie sheet and bake it at 350 degrees for 45 min-1 hour). It's perfect for a cold day and goes great with grilled cheese on sourdough and a side salad.

Butternut Squash Bisque
Ingredients
2- 2 1/2 c. cooked butternut squash, cubed
half of a yellow onion, diced
1 carrot, diced
2 stalks celery, diced
1 clove garlic, minced
1/2 tsp. sage
1/4 tsp. thyme
1/4 tsp. paprika
1/4 tsp. cayenne pepper
1/2 tsp. freshly ground black pepper
1 tsp. salt
pinch of nutmeg & ginger
1 tbsp. butter
3 tbsp. flour
4 c. chicken broth or stock
1/2 c. fat-free half-and-half
low-fat sour cream or cream cheese for garnish

DIRECTIONS:
1. In a large saucepan, heat butter over medium heat. Add onion, garlic, celery and carrot. Cook, stirring occasionally until vegetables are tender, about 5 minutes.
2. Sprinkle flour over top and mix so that all of the ingredients are coated. Cook for 2 minutes, stirring frequently.
3. Add squash, broth and half-and-half. Bring to a boil. Reduce to a simmer, adding sage, thyme, paprika, cayenne pepper, black pepper, salt, nutmeg and ginger. Allow to simmer for 20-30 minutes (this will be about the same amount of time if you decide not to pre-cook your squash).
4. Remove from heat and use a ladle to scoop the mixture into a blender (I was able to fit all of mine in one batch). Puree until smooth. Serve with a dollop of sour cream or cream cheese for garnish. Season with salt and pepper to taste.
Stephen + Natalie | Makes approximately 4-6 servings

Lasagna Soup

1

Thursday, March 1, 2012

So I've been making a lot of soups and hot dishes lately. I blame it on the cooler weather we're having here, but regardless, they've all been really tasty. I started by making lasagna soup, then my three bean chili, I moved on to butternut squash risotto, and then finally stopped with a butternut squash soup. The reason why I love this lasagna soup so much I that it has the same great taste of lasagna, but without the time, effort and mess that goes into it. If you're not a fan of zucchini or squash, you can simply omit those two ingredients, I just always add extra veggies where I can.

Lasagna Soup
Ingredients
2 tsp. olive oil
1-1/2 lbs. Italian sausage or ground beef
3 c. chopped onions
4 garlic cloves, minced
1 zucchini, sliced
1 small yellow crookneck squash, sliced
2 tsp. dried oregano
1/2 tsp. crushed red pepper flakes
2 T. tomato paste
1 28-oz. can fire roasted diced tomatoes
2 bay leaves
6 c. chicken stock
8 oz. mafalda or fusilli pasta (or break up bits of lasagna noodles)
1/2 c. finely chopped fresh basil leaves
salt and freshly ground black pepper, to taste
Cheesy "filling"
8 oz. ricotta
1/2 c. grated Parmesan cheese
1/4 tsp. salt
pinch of freshly ground pepper
2 c. shredded mozzarella cheese
DIRECTIONS:
1. Heat olive oil in a large pot over medium heat. Add sausage or ground beef, breaking up into bite sized pieces, and brown for about 5 minutes. Add onions and cook until softened, about 6 minutes. Add garlic, oregano, and red pepper flakes. Cook for 1 minute. Add tomato paste and stir to incorporate. Cook for 3 to 4 minutes, or until the tomato paste turns brown in color.
2. Add diced tomatoes, zucchini, squash, bay leaves, and chicken stock. Stir to combine. Bring to a boil and then reduce heat and simmer for 30 minutes. Right before serving, stir in the basil and season to taste with salt and freshly ground black pepper. In a separate pot, cook pasta.
3. While the pasta is cooking, prepare the cheesy yum. In a small bowl, combine the ricotta, Parmesan, salt, and pepper.
4. To serve, place a ladle full of pasta in each bowl, then a dollop of the cheesy filling-  sprinkle some of the mozzarella on top and ladle the hot soup over the cheese. Enjoy!

Life Made Simple All rights reserved © Blog Milk - Powered by Blogger