A Simple Superhero Cape

3

Friday, May 11, 2012

Earlier this week I made a little superhero cape for Will. He had been pretending like his sister's dresses were capes and would throw them over his shoulders and hold them by the sleeves. I figured maybe it was time for the real deal, although when I gave it to him it took a while for him to realize what it was and actually put it on. Anyway, this project only cost about $6 and took less than 30 minutes to make. Here's what you'll need:
 1. To begin, start by tracing the letter you want onto the paper. I used a 2" ruler to do this. Once you have it drawn, cut it out and pin to the yellow felt. Cut out. Lay the yellow letter onto the red piece of felt and pin. Cut around it to make a shape that looks nice with whatever letter you have chosen. It doesn't have to be perfect.
 2. Next, pin around all edges of the yellow letter. Sew as close to the edge as possible. Make sure you topstitch with yellow thread and use blue thread for your bobbin (it will look better on the back). Once you have stitched that, place it onto the blue fabric, making sure to center/level it. Topstitch around the edges with red thread, keeping the blue thread as your bobbin. Once the letter is securely attached, begin to work on finishing the raw edges of the cape.
 3. Take the two side edges (left and right) and fold in ¼", press. Fold the bottom edge in ¼", press. Return to the sides and fold an additional ¼", press. Then turn up the bottom 1" and press. It should look like the picture below. Pin in place and stitch around the inner edges to keep in place.
 4. Now lets finish the top. Since I had a selvage I was able to just fold it over ¾" and sew along the edge, but if you don't have a selvage, fold the raw edge ¼", press and then fold over ¾", press. Stitch the folded edge at ¹⁄₈". That way you have a casing for your ribbon or string to go through. In order to get your ribbon through, you may want to consider pining a safety pin to the edge and using that to guide you through. Once you have the string through, gather evenly on the edges of the cape (you want the leave the middle section ungathered so your letter doesn't get messed up). Once they are even and the string is even at both ends, stitch in place vertically before the gathering begins and right where the seam is at the edge of the fabric. This way the gathering stays in place and it will always look nice and even.
5. To finish, trim all threads, press any wrinkles out and make sure the edges of the ribbon or string are finished so they do not fray (sew, use fray check, heat treat it). Then you're done! Now you can make them in all sorts of colors!

You Are My Sunshine- I Spy/Taggie Toy

10

Tuesday, May 1, 2012

 Several months ago I stocked up on felt and bought some of the items to make little I spy bags. Just yesterday I came across the box I had tossed the materials in and decided it was time to make something of it all. I had this idea of making them into cute little shapes (fish, turtle, whale), but then I thought it would be cute to combine the felt with scraps of ribbon to make an I spy bag/taggie. If you would like to make one, here is what you need:

Materials
1-2 bags of clear craft beads (any shape)
Alphabet beads, sequins, decorative buttons, any other little trinkets
Clear vinyl (1) 7x7" square (can be found in the home decor section at JoAnn Fabrics,
just take that giant roll up to the counter and have them cut you off a big strip)
Felt (2) 7x7" squares
3 different colors of ribbon (15" of each)
Thread, scissors, pins
Fabric Marker or Pencil
2 circles to trace (1 big, 1 small)

IMPORTANT NOTE:
The size of your felt and vinyl will depend on how big the circular items you trace are.
My Corningware lid was a little bigger than 6" in diameter.
1. To get started, cut two squares of felt (measure the diameter of your biggest circle and add a 1/4"). Trace and cut both squares of felt into two large circles. Then take one and cut a smaller circle into the center of it. This will be the piece with the vinyl window. Cut the vinyl to match the size of the large circle.
 2. Take the ribbon and cut into (3) 5" pieces. You should have a total of 9 pieces of ribbon. Fold over the ribbon and pin the raw edges to the top of the solid felt circle. About 1/4" of ribbon should overlap the felt. Grab the circle with the hole, lay it on top of the vinyl circle and pin in place. Stitch closely around the inner edge (pictured below). Place the piece with the vinyl window on top of the piece with the ribbons. One pin at a time, remove and re-pin so that the pins are on the surface of the circle with the vinyl window (but are still holding the ribbon in place). Sew together leaving a 1 1/2" gap so that you can fill it up. Layer in objects and beads. Leave enough room so that the items can move around and so that you can sew it up without having anything in the way. With your machine, stitch over the gap, making sure to backstitch or "fix" at both ends. Examine edges to make sure there are no holes.
3. Remove any unwanted threads or excess vinyl around the edges. If desired, press ribbon edges to flatten. It's done!
Shortly after making the sun I realized that I had some brown and green ribbon left over from our wedding- score! So of course I had to make an apple. As you can see, you can make pretty much anything. Happy sewing!
P.S. I'd love to see your creations... if you make one, comment and leave me a link!
This tutorial is currently being featured over at Nap Time Crafters.

Flower child

0

Thursday, June 2, 2011

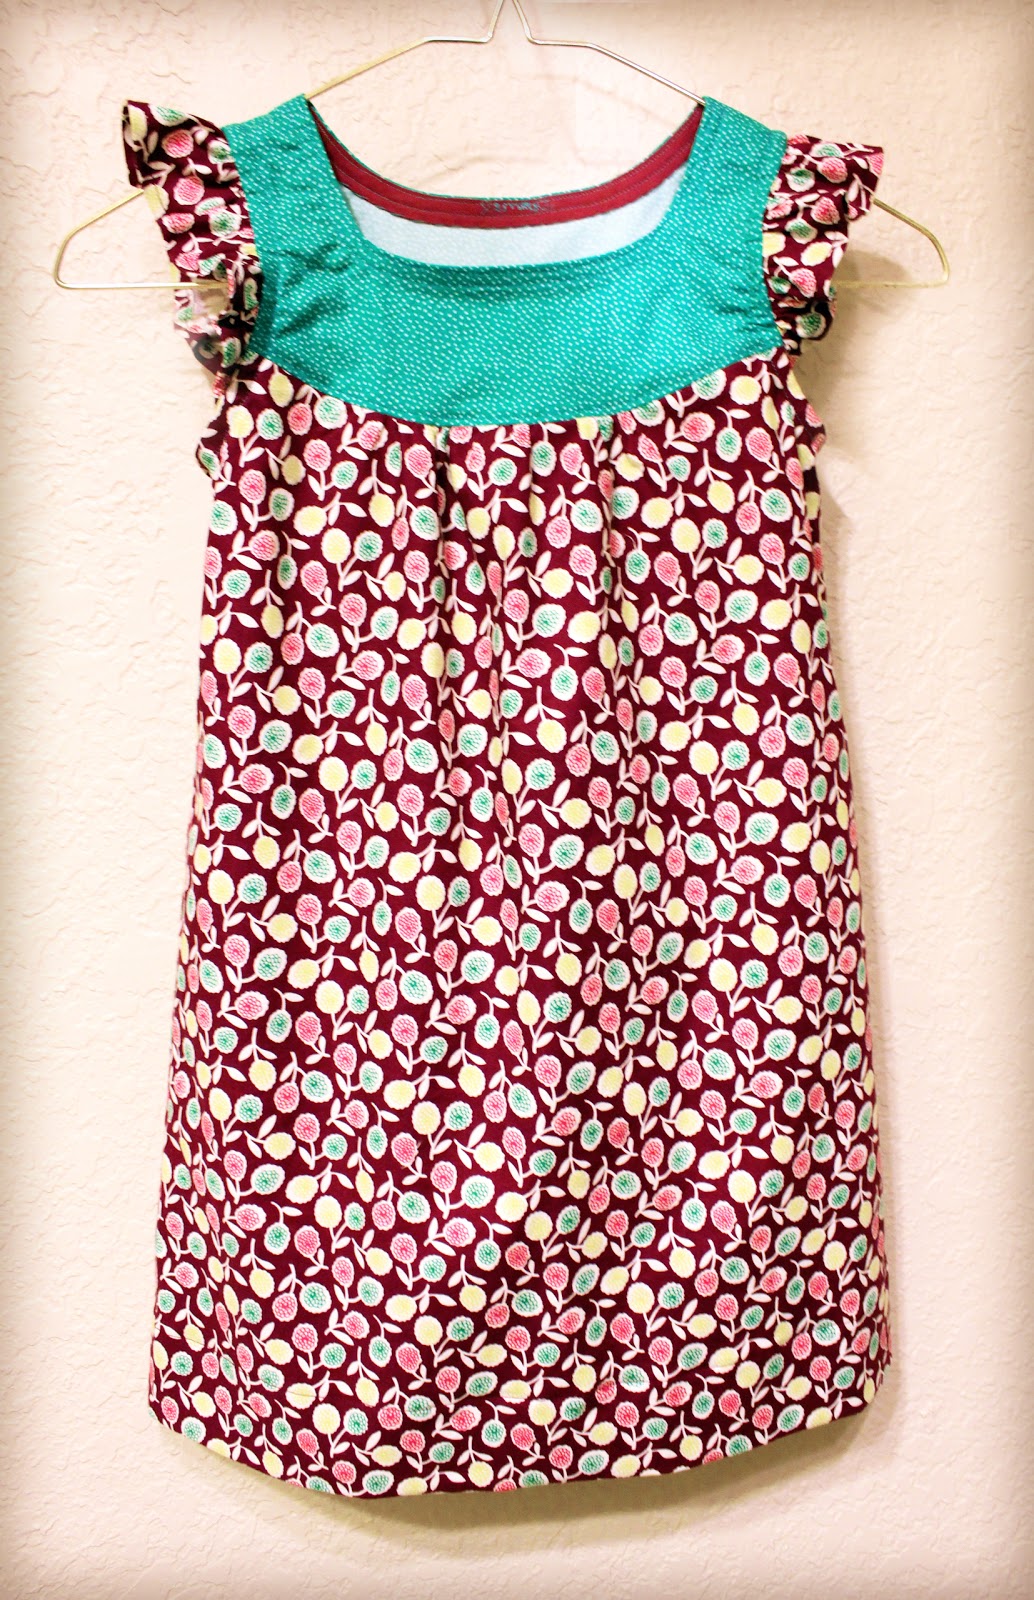
Ok, so you can probably tell by now that I love to make things for kids. Sure we don't have any, but it's always fun to spoil nieces and nephews, right? The other day bought a couple little pieces of fabric and paired them with some things that I've had in my collection. Now that I have planned out what each is going to look like, I'm excited to see the end product.
Todays project was a really easy dress. It comes from Simplicity (2241). I always feel like a rule of thumb for making kids clothing is that the pattern shouldn't be complicated and that you shouldn't have to spend more than a few hours making it. Despite all of the distractions today, I was able to finish it. I'm considering adding a few little rosettes to one side of the yoke. I just can't decide whether I like it or not.

Life Made Simple All rights reserved © Blog Milk - Powered by Blogger