Easy-to-sew Summer Dress

2

Monday, May 14, 2012

I bought this pattern a while back and started cutting out the pieces in hopes of making it before we moved to Jacksonville. But somehow in the chaos of it all, the two sheets of instructions disappeared. So I  went to JoAnn's to see if I could find the pattern and take a little peek at the directions, but apparently it is one of their featured patterns this summer and was completely sold out. When I got home I read the back of the pattern and decided that I had enough information to go forward. I finished the dress in about an hour and somehow it turned out looking exactly like the example they had on a mannequin in the store. If you have a daughter, granddaughter, or niece to sew for, and you're lucky enough to find this pattern, get it! It's a quick sew and is incredibly versatile. I know that's not the most flattering picture of the dress, but I promise it's adorable in person- just look at the little model above!

A Simple Superhero Cape

3

Friday, May 11, 2012

Earlier this week I made a little superhero cape for Will. He had been pretending like his sister's dresses were capes and would throw them over his shoulders and hold them by the sleeves. I figured maybe it was time for the real deal, although when I gave it to him it took a while for him to realize what it was and actually put it on. Anyway, this project only cost about $6 and took less than 30 minutes to make. Here's what you'll need:
 1. To begin, start by tracing the letter you want onto the paper. I used a 2" ruler to do this. Once you have it drawn, cut it out and pin to the yellow felt. Cut out. Lay the yellow letter onto the red piece of felt and pin. Cut around it to make a shape that looks nice with whatever letter you have chosen. It doesn't have to be perfect.
 2. Next, pin around all edges of the yellow letter. Sew as close to the edge as possible. Make sure you topstitch with yellow thread and use blue thread for your bobbin (it will look better on the back). Once you have stitched that, place it onto the blue fabric, making sure to center/level it. Topstitch around the edges with red thread, keeping the blue thread as your bobbin. Once the letter is securely attached, begin to work on finishing the raw edges of the cape.
 3. Take the two side edges (left and right) and fold in ¼", press. Fold the bottom edge in ¼", press. Return to the sides and fold an additional ¼", press. Then turn up the bottom 1" and press. It should look like the picture below. Pin in place and stitch around the inner edges to keep in place.
 4. Now lets finish the top. Since I had a selvage I was able to just fold it over ¾" and sew along the edge, but if you don't have a selvage, fold the raw edge ¼", press and then fold over ¾", press. Stitch the folded edge at ¹⁄₈". That way you have a casing for your ribbon or string to go through. In order to get your ribbon through, you may want to consider pining a safety pin to the edge and using that to guide you through. Once you have the string through, gather evenly on the edges of the cape (you want the leave the middle section ungathered so your letter doesn't get messed up). Once they are even and the string is even at both ends, stitch in place vertically before the gathering begins and right where the seam is at the edge of the fabric. This way the gathering stays in place and it will always look nice and even.
5. To finish, trim all threads, press any wrinkles out and make sure the edges of the ribbon or string are finished so they do not fray (sew, use fray check, heat treat it). Then you're done! Now you can make them in all sorts of colors!

You Are My Sunshine- I Spy/Taggie Toy

10

Tuesday, May 1, 2012

 Several months ago I stocked up on felt and bought some of the items to make little I spy bags. Just yesterday I came across the box I had tossed the materials in and decided it was time to make something of it all. I had this idea of making them into cute little shapes (fish, turtle, whale), but then I thought it would be cute to combine the felt with scraps of ribbon to make an I spy bag/taggie. If you would like to make one, here is what you need:

Materials
1-2 bags of clear craft beads (any shape)
Alphabet beads, sequins, decorative buttons, any other little trinkets
Clear vinyl (1) 7x7" square (can be found in the home decor section at JoAnn Fabrics,
just take that giant roll up to the counter and have them cut you off a big strip)
Felt (2) 7x7" squares
3 different colors of ribbon (15" of each)
Thread, scissors, pins
Fabric Marker or Pencil
2 circles to trace (1 big, 1 small)

IMPORTANT NOTE:
The size of your felt and vinyl will depend on how big the circular items you trace are.
My Corningware lid was a little bigger than 6" in diameter.
1. To get started, cut two squares of felt (measure the diameter of your biggest circle and add a 1/4"). Trace and cut both squares of felt into two large circles. Then take one and cut a smaller circle into the center of it. This will be the piece with the vinyl window. Cut the vinyl to match the size of the large circle.
 2. Take the ribbon and cut into (3) 5" pieces. You should have a total of 9 pieces of ribbon. Fold over the ribbon and pin the raw edges to the top of the solid felt circle. About 1/4" of ribbon should overlap the felt. Grab the circle with the hole, lay it on top of the vinyl circle and pin in place. Stitch closely around the inner edge (pictured below). Place the piece with the vinyl window on top of the piece with the ribbons. One pin at a time, remove and re-pin so that the pins are on the surface of the circle with the vinyl window (but are still holding the ribbon in place). Sew together leaving a 1 1/2" gap so that you can fill it up. Layer in objects and beads. Leave enough room so that the items can move around and so that you can sew it up without having anything in the way. With your machine, stitch over the gap, making sure to backstitch or "fix" at both ends. Examine edges to make sure there are no holes.
3. Remove any unwanted threads or excess vinyl around the edges. If desired, press ribbon edges to flatten. It's done!
Shortly after making the sun I realized that I had some brown and green ribbon left over from our wedding- score! So of course I had to make an apple. As you can see, you can make pretty much anything. Happy sewing!
P.S. I'd love to see your creations... if you make one, comment and leave me a link!
This tutorial is currently being featured over at Nap Time Crafters.

Modern blessing dress

0

Sunday, December 18, 2011

A couple of days ago a friend from our ward asked me if I could help her design and sew a blessing dress for her daughter. She wanted something modern, with lots of ruffles and that wasn't going to cost much. I rummaged through our closet and found some scraps of white fabric from making Stephen's white shirt, and a onesie that he had left over from a silkscreening project. Once the design was sketched out, we went to work. A couple hours later (we only had a few hours to make the dress since Stephen and I planned to leave town the following day), this is what we came up with-
It's definitely not your typical blessing dress, but it is unique and designed especially for her.

Handmade Halloween Part 2

0

Monday, October 31, 2011

As promised, here is Will's Peter Pan costume.
His little green tunic.
No pattern required for this one. I just followed the outline of one of his normal shirts,
making it a bit wider and about 6 inches longer. Then I cut the neckline which created the
collar and cut triangles around hem and sleeves. 
Stick a feather in it, it's done.
For the hat, I measured his head, cut out 4 pieces of felt (2 for the hat and 2 for the brim).
I sewed the two main pieces together and then carefully stitched the brim to it. I flipped up
the brim and then tucked a feather in it once it was done. The elastic was an afterthought but it
was definitely necessary. I didn't measure anything, mainly because I didn't have him 
there when I was making it, so I took a wild guess and it ended up working out perfectly.
Belt + Knife + Shoes
The belt and knife were really easy to make. I just kind of came up with it as I went along.
I did however, attach it to the shirt, that way nothing could fall/get ripped off. For the
shoes I used a tutorial to help guide me along. They only took about 30 minutes to make!
Katie purchased the tights which really made everything come together.
It was a super easy costume to make, relatively cheap, and probably pretty comfortable too.


Handmade Halloween Part 1

6

Thursday, October 27, 2011

I know the blog has been overrun by baked goods, but I just wanted to let you all know that I am still sewing. These past couple of days have been full of sparkles, boas and a whole lot of lime green fabric. Yep, I've been making a Tinkerbell dress for Katie and Bill's little girl, Emme (she's almost 3). When I first started making the dress I decided it would be a good idea to buy a pattern. I found a Simplicity one that had a few different fairy options but when I opened the pattern and started working on it, I realized that whoever designed the pattern was just downright crazy. It was way too complicated, way too much work and had you doing a lot of unnecessary things. So I drew up my own pattern, crossed my fingers that it would fit, and went to back to work. About half way through the project I was talking to Emme and she wanted nothing to do with being a fairy for Halloween. "I don't want to be a tooth fairy," she said. Luckily when she came over to try the dress on Wednesday she was really excited. All she could talk about was how she was going to be Tinkerbell and wear her pretty dress to school. Crisis averted :)

A little pixie dust goes a long way...
All of the fabric was purchased at JoAnn Fabrics. As I mentioned above,
the pattern was Simplicty 2259,  but I think it was kind of a waste of money.
Of course you would never know until you opened it. I drafted the bodice using
an old pattern that I had sewn for her before, making sure it was still the right size.
(Dr. Burnham, you'd be so proud!) Then I used the idea of the petals and the tulle 
skirt and combined them together with the new bodice. The waistband just ties in the
back, and the wings velcro on. No straps necessary. 
It wouldn't be any fun without the wand.
I thought about making a wand several times, and then after realizing that it was
probably going to be the coolest part of the outfit for her, I did. I found a dowel
and wrapped some curling ribbon around it. I glued long strands of ribbon to the
top and then covered it with the same feather boa puff that's on her shoes.
The one thing I didn't dare try to make, her wings.
They were a really good deal at JoAnn's and they matched perfectly. Somehow Stephen
spotted them out of the corner of his eye. Thank goodness. I know I'm crafty/the
pattern actually came with instructions, but really, who has the time or the patience?
Check out those pretty little shoes!
It's amazing what some lime green spray paint, glitter and feathers can do!
And the parade begins!!!
She couldn't stop checking herself out in the windows. So cute :)


Next up: Will's Peter Pan costume...
... it should be up in a day or two!

The easiest afternoon project

0

Thursday, September 1, 2011

Now that we're living in Florida, there's not much use for our winter clothing. So instead of getting rid of certain items or keeping them packed away, I decided to take my scissors and sewing machine to them. This is by far the most simple refashion I've done, but I needed a pair of lighter/shorter pajamas and I didn't want to buy new ones.

Another trip to Jacksonville

0

Saturday, July 2, 2011

Yet again, our weekend consisted of driving to and from Jacksonville, only this time our trip was successful! We finally found the perfect place to live for the next three years (hopefully), and the best part is... the location! It's only a couple of minutes away from where Stephen will be going to school. Also the 3 bedrooms + attached garage is pretty nice too :) While up there we stayed with our friends Katie and Bill again. I had a few little gifts that I made for their kids so here they are:

P.S. I'll be selling those adjustable harnesses soon, so keep your eyes out!

Dresses, four ways

1

Monday, June 20, 2011

Fabric: Joann's  &  Patterns: Simplicity

Mason jar pincushion

11

Saturday, June 18, 2011

When it comes to sewing I've always struggled with keeping my pins in one place (Stephen can attest to that). That's not to say I don't have a pincushion, I just find that when I'm sewing I feel as if I'm too busy to put them back. But these little pincushions are quite clever and practical. I've seen them on a few crafting websites and thought that just maybe I'd be more willing to take the time to keep things organized. Plus the added storage beneath is great for buttons, trims, needles, or thread/bobbins.


Pincushion Tutorial
Materials Needed
6x6 fabric scrap of your choice
jar with lid and band
cotton balls or fiberfill
cardstock (any color)
glue gun


Step 1: Using the lid of the jar, cut out a circle of the same size from the cardstock.

Step 2: Using the lid of the jar, trace around it on the WRONG side of your fabric. Increase the circle's radius by 1-2 inches and cut out the larger circle.

Step 3: Layer the fabric, cotton balls, and lid, then place the "sandwich" inside the band.

Step 4. Press the lid down so that the cotton balls and fabric form the pincushion on the opposite side of the band. Check to see if you need to move the fabric to avoid creases. Make any necessary adjustments and then fold in the fabric and hot glue it to the underside of the lid.

Step 5: Trim away any excess fabric and hot glue the cardstock over the fabric edges.

Step 6: Line the band with a small bead of glue and insert the pincushion into it- pressing firmly. Add the lid to the jar and you have a brand new pincushion- enjoy!

Wall decor {in less than 5}

0

Thursday, June 16, 2011

I love the idea of reusing old things or using cheap things in general. This is such a simple project, all you need is an embroidery hoop, fabric, and about 5 minutes to put it together (unless you are going to embroider or patch pieces of fabric together). Just make sure that your fabric is ironed and that you use a muslin backing if your fabric is translucent.


Flower child

0

Thursday, June 2, 2011

Ok, so you can probably tell by now that I love to make things for kids. Sure we don't have any, but it's always fun to spoil nieces and nephews, right? The other day bought a couple little pieces of fabric and paired them with some things that I've had in my collection. Now that I have planned out what each is going to look like, I'm excited to see the end product.
Todays project was a really easy dress. It comes from Simplicity (2241). I always feel like a rule of thumb for making kids clothing is that the pattern shouldn't be complicated and that you shouldn't have to spend more than a few hours making it. Despite all of the distractions today, I was able to finish it. I'm considering adding a few little rosettes to one side of the yoke. I just can't decide whether I like it or not.

Pint sized sophistication

0

Saturday, May 28, 2011

My latest project was inspired by a stroll down the sale aisle at Joann's. What can I say, I love getting a good deal. How good? This little girl's dress only cost $10 to make. That includes fabric, trims, buttons and the pattern. Gotta love Memorial Day deals! I slightly altered the pattern to make it more how I envisioned it, but they were basic changes. Stephen said it looks like a tiny cocktail dress, I think it looks like a mini Anthropologie dress. My only change would be adding more fullness to the skirt (it looks a lot less full because it's tied in the back). If there's one piece of advice I'd give to my fellow sewers, it would be to get creative! Don't let the pattern or the pictures dictate what you make. There are so many fun things you can do to make projects unique and stylish! Happy sewing!


Introducing: The Peacoat

0

Wednesday, April 27, 2011

Finally, it's done. I'll no longer have night terrors about it. I can't even begin to explain the burden that has been lifted off of my shoulders. It's hard to imagine just how much time and effort I've put into this project. In my advanced clothing construction class we had to make peacoats with notched or built-in collars. Unfortunately the pattern I wanted to use with my really cool wool didn't meet the requirements, so I had to choose a very basic pattern and very simple wool. I decided to design the ruffle. At first I had three tiers, but it ended up looking like a Betsy Johnson tutu gone wrong. So I ripped it off and created one slightly ruffled layer. Then we had to create a lining. I had no idea just how much work went into lining something. I can't imagine I'll ever do it again, but I've certainly enjoyed learning all of the tricks and techniques. I feel like I have learned so much in this class, I wish there was more, but that's it, I've reached the end of the road. I'm sad that I won't be around to take the swimsuit class, because I'd love to learn how to make them, but who knows, maybe I'll be daring enough to try one out on my own.


Disclaimer
I know this is a HORRIBLE picture and view, but it's the best I could do considering
I was in class and now the coat is in Florida. I promise it looks much better on!

Clover Garland

0

Friday, March 11, 2011

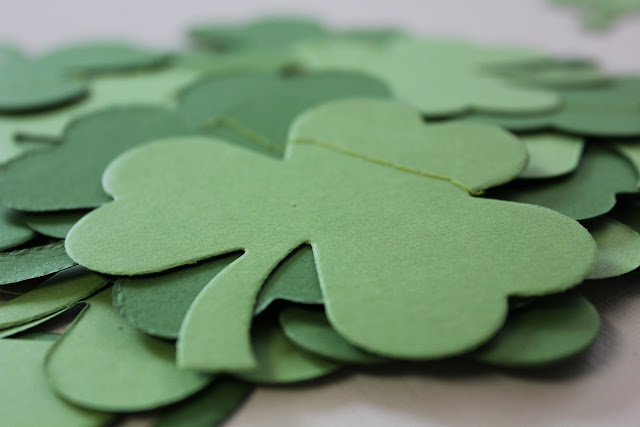
Garland is such an simple and easy way to decorate for the holidays. I used the Edison machine at Archivers to cut out the clovers and then took them home and sewed them together.

Tiered Apron

1

Sunday, February 27, 2011

I picked up a pattern book for aprons the other day at the Fabric Mill. It has six mix & match designs. I choose to stick with one and followed it, making a few adjustments along the way. I wasn't sure about the colors but I think it turned out pretty well.


Flannel pillowcase

0

Saturday, February 19, 2011

This little project was incredibly easy to make. It was actually a requirement for one of my GE's. I'd say it took me about 10 minutes to make (and cost about $3.00- fabric from JoAnn's). Just cut a rectangle on the fold and sew. Add a contrast band and finish. It's perfect for the winter time or just as a decoration. The best part is that you can make a case that fits any pillow you have and you get to choose the fabric!

Heart garland

3

Sunday, February 13, 2011

This garland was so simple and fun to make. I cut out the paper hearts using the Edison machine at Archivers. Then I adjusted my sewing machine to make it easier to sew through multiple layers of paper. I changed the needle & stitch length and that seemed to do the trick. Lastly, I fluffed them up a little to give them more dimension.

Introducing...

1

Wednesday, December 15, 2010

My newest creation/last project for my intermediate sewing class.

Classy

0

Saturday, December 11, 2010

My second assignment for intermediate sewing was to make a men's tailored shirt. This project was definitely the hardest yet. The techniques that we learned were really helpful but hard to do. My seam ripper became my best friend along with my iron... steam can fix anything :). Stephen kept checking in with me to see how it was coming along. Most of the time I just gave him a frustrated look and he would switch the topic of conversation. Luckily it's finished and it fits him.

Here's a little preview of what's going into my 3rd project. It will be debuting on 12/15/2010:

Life Made Simple All rights reserved © Blog Milk - Powered by Blogger