Handmade Halloween Part 2

0

Monday, October 31, 2011

As promised, here is Will's Peter Pan costume.
His little green tunic.
No pattern required for this one. I just followed the outline of one of his normal shirts,
making it a bit wider and about 6 inches longer. Then I cut the neckline which created the
collar and cut triangles around hem and sleeves. 
Stick a feather in it, it's done.
For the hat, I measured his head, cut out 4 pieces of felt (2 for the hat and 2 for the brim).
I sewed the two main pieces together and then carefully stitched the brim to it. I flipped up
the brim and then tucked a feather in it once it was done. The elastic was an afterthought but it
was definitely necessary. I didn't measure anything, mainly because I didn't have him 
there when I was making it, so I took a wild guess and it ended up working out perfectly.
Belt + Knife + Shoes
The belt and knife were really easy to make. I just kind of came up with it as I went along.
I did however, attach it to the shirt, that way nothing could fall/get ripped off. For the
shoes I used a tutorial to help guide me along. They only took about 30 minutes to make!
Katie purchased the tights which really made everything come together.
It was a super easy costume to make, relatively cheap, and probably pretty comfortable too.


Handmade Halloween Part 1

6

Thursday, October 27, 2011

I know the blog has been overrun by baked goods, but I just wanted to let you all know that I am still sewing. These past couple of days have been full of sparkles, boas and a whole lot of lime green fabric. Yep, I've been making a Tinkerbell dress for Katie and Bill's little girl, Emme (she's almost 3). When I first started making the dress I decided it would be a good idea to buy a pattern. I found a Simplicity one that had a few different fairy options but when I opened the pattern and started working on it, I realized that whoever designed the pattern was just downright crazy. It was way too complicated, way too much work and had you doing a lot of unnecessary things. So I drew up my own pattern, crossed my fingers that it would fit, and went to back to work. About half way through the project I was talking to Emme and she wanted nothing to do with being a fairy for Halloween. "I don't want to be a tooth fairy," she said. Luckily when she came over to try the dress on Wednesday she was really excited. All she could talk about was how she was going to be Tinkerbell and wear her pretty dress to school. Crisis averted :)

A little pixie dust goes a long way...
All of the fabric was purchased at JoAnn Fabrics. As I mentioned above,
the pattern was Simplicty 2259,  but I think it was kind of a waste of money.
Of course you would never know until you opened it. I drafted the bodice using
an old pattern that I had sewn for her before, making sure it was still the right size.
(Dr. Burnham, you'd be so proud!) Then I used the idea of the petals and the tulle 
skirt and combined them together with the new bodice. The waistband just ties in the
back, and the wings velcro on. No straps necessary. 
It wouldn't be any fun without the wand.
I thought about making a wand several times, and then after realizing that it was
probably going to be the coolest part of the outfit for her, I did. I found a dowel
and wrapped some curling ribbon around it. I glued long strands of ribbon to the
top and then covered it with the same feather boa puff that's on her shoes.
The one thing I didn't dare try to make, her wings.
They were a really good deal at JoAnn's and they matched perfectly. Somehow Stephen
spotted them out of the corner of his eye. Thank goodness. I know I'm crafty/the
pattern actually came with instructions, but really, who has the time or the patience?
Check out those pretty little shoes!
It's amazing what some lime green spray paint, glitter and feathers can do!
And the parade begins!!!
She couldn't stop checking herself out in the windows. So cute :)


Next up: Will's Peter Pan costume...
... it should be up in a day or two!

Chili & cornbread

2

Wednesday, October 26, 2011


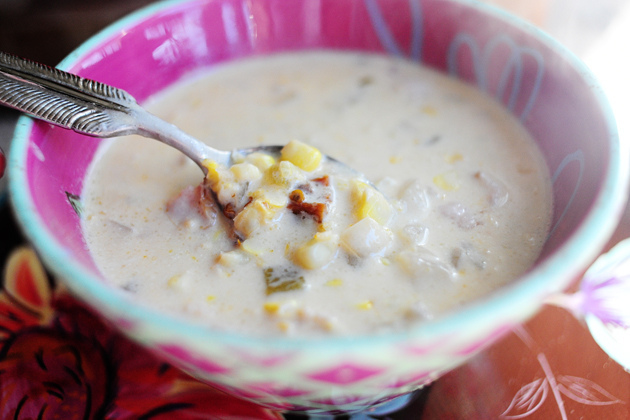
Monday was just one of those days for us. We were both tired and didn't feel like doing much. I wanted to make dinner but I didn't want to spend a lot of time in the kitchen so I figured chili would be the perfect solution. It took me a while to come up with this recipe, but it was well worth the time it took to do so. This chili is packed full of peppers (which makes it a little spicy), tender meat and lots of beans. The cornbread is a combination of several recipes I've used in the past. It's sweet but not to the point that it tastes like cake. You can definitely taste the cornmeal- which is the best part, right? One of my favorite things to eat cornbread with is honey butter. If you're looking for a good recipe you can find one here. Enjoy!

Three Bean Chili
Ingredients
1 tbsp. butter
1 1/2 tbsp. canola oil
3 cloves garlic, minced
1 jalapeno, minced
1 poblano chili, minced
1 red bell pepper, diced
2 Anaheim chiles, diced
1 yellow onion, diced
1/2 lb. ground beef
1/2 lb. boneless chuck, cut into 1/4-inch cubes
1/2. lb. ground Italian sausage (or hot, or mild)
1 tsp. garlic powder
1 tsp. onion powder
2 tsp. chili powder
1 tsp. paprika
1/2 tsp. cayenne pepper
1 tsp. cumin
1 tsp. coriander
1 tsp. Nature's Seasoning
1 tsp. salt
1 tsp. freshly ground pepper
2/3 c. tomato sauce
1/4. c. tomato paste
1 (14.5 oz.) can diced tomatoes
1 (14.5 oz.) can chicken stock
1 (15 oz.) can pinto beans
1 (15 oz.) can light red kidney beans
1/2 (15 oz.) can dark red kidney beans

DIRECTIONS:
1. In a large pot over medium-high heat, add butter and canola oil. Add peppers, chilies, onion and garlic and cook until tender, about 5 minutes.
2. Add chuck and brown, about 3 minutes. Add ground beef and sausage, stirring gently, trying not to break it up too much. Cook meat until it is nicely browned, about 5 minutes.
3. Add onion powder, garlic powder, chili powder, paprika, cayenne, cumin, coriander, Nature's Seasonings, salt and pepper. Stir and cook for 1 minute.
4. Add tomato sauce, tomato paste and diced tomatoes. Cook for 2 minutes, stirring frequently to prevent sauce from burning.
5. Stir in chicken stock, then add beans. Lower heat and allow to simmer for 1 hour and 30 minutes.
Makes 5-7 servings


Honey Cornbread
Ingredients
1 c. yellow cornmeal
1 c. all-purpose flour
1 tbsp. baking powder
1/2 c. granulated sugar
1 tsp. salt
1 c. whole milk
2 large eggs
1/2 c. (1 stick) butter, melted
1/4. c honey

DIRECTIONS:
1. Preheat oven to 400 degrees F.
2. In large mixing bowl, beat together whole milk, eggs, butter and honey, until light and creamy.
3. Add cornmeal, flour, salt and sugar, mix until smooth.
4. Add baking powder and stir gently until incorporated.
5. Place liners into tins. Evenly divide the mixture between the papers (they should be about 3/4 of the way full).
6. Bake for 15 minutes, or until golden brown.
Makes 12 muffins or 6 mini loaves 


This past week

0

Monday, October 24, 2011

This past week was a rough one for me. Since last Sunday I've been feeling pretty horrible... ok, really horrible. It started with a bad sore throat and then eventually turned into a viral infection that will take another 6+ days to get over. Sigh. Despite the symptoms and lack of sleep, I was actually able to get a few things done. Since Stephen's birthday was Saturday, I spent most of the week preparing for that (which included tackling a pile of laundry we had been playing Jenga with for more than a few days... seriously it was huge/growing up our closet wall) as well as getting a lesson done for my Cub Scouts, cleaning, getting the house ready for friends to stay with us, errand running and present wrapping. While I was grocery shopping, I found those pretty flowers below and some cool pumpkins. How much did they cost me? $12! Thank you Publix! During one of my energy spurts (about 30 minutes after taking medication) I made Wisconsin cauliflower soup and paninis. You can find the recipe for the soup via the link below. Now that I think about it, that probably wasn't the best move ever, especially after thinking about those 15 minutes of Stephen telling me to relax and that he'd go pick us up something to eat. But thankfully it's Monday and that week is over. I realize that I probably should have gone to the doctor sooner and I probably should have taken it easier (but thank you Stephen for putting up with me, I'm stubborn I know, but I really appreciate you always being there for me). Hopefully this week will be different. I'll keep you posted.


{soupNote: I pureed the mixture in a blender for 2 minutes on a medium speed to make it smooth and creamy.


Mitt Romney Pumpkin

Thursday, October 20, 2011

Stephen has been working on a pumpkin for our friends Katie and Bill. 
This is what it looked like when it was almost finished...
Almost finished
And this is what it looked like finished!

A tasty twist on classic cinnamon rolls

18

Tuesday, October 18, 2011

After making the cheesecake and cupcakes the other day, I had a container full of leftover pumpkin. I kept trying to think what I could do with it, I was thinking about making Pumpkin Smash smoothies but that called for soy milk and vanilla frozen yogurt, which I didn't have on hand. Then I remembered that a few weeks back I had wanted to make pumpkin cinnamon rolls and that they just happened to call for the amount of pumpkin I had left over. So I adapted a recipe and gave them a shot. Both Stephen and his friend Eric agreed that although they didn't scream pumpkin, the subtlety was nice.

Pumpkin Cinnamon Rolls with Cream Cheese Frosting
Ingredients
1/4 c. warm water
1 package (or 2 1/4 tsp.) active dry yeast (at room temp)
1/3 c. whole or 2% milk
1 large egg, beaten
3/4 c. solid-pack pumpkin puree
1 tbsp. butter, melted
3 1/4 c. flour
1/4 c. brown sugar
1/4. c. granulated sugar
1 tsp. salt
1/2 tsp. ground cinnamon
1/4 tsp. pumpkin pie spice

Filling:
1/3 c. (1 stick) butter
2/3 c. granulated sugar
1/4 c. brown sugar
2 tsp. cinnamon
1/2 tsp. pumpkin pie spice
2-3 tbsp. solid-pack pumpkin puree or pumpkin butter (optional)

Frosting:
4 oz. cream cheese
1/2 c. (1 stick) butter, softened
Pinch of salt
1 tsp. vanilla extract
1/2 tsp. lemon juice
2 tbsp. whole or 2% milk
2-3 c. powdered sugar

DIRECTIONS:
1. Stir yeast into water in a large bowl. Allow to rest for 5-10 minutes before stirring to combine (it should get thicker and begin to bubble). Stir in the milk, egg, pumpkin, butter, 1 1/4 c. flour, brown sugar, granulated sugar, salt, cinnamon and pumpkin pie spice. Beat vigorously with paddle attachment for 2 minutes.
2. Attach dough hook to mixer. Slowly add the rest of the flour, a little at a time, until the dough is stiff enough to knead.
3. Turn dough onto a floured surface. Knead, adding flour if necessary, until the dough is smooth and elastic. Place dough into a greased bowl (olive oil is fine), turn the dough to coat the entire ball. Cover with plastic wrap and allow to rise until doubled, approximately 1 hour. If the dough is has not doubled by then, allow it to rise for an additional half hour.
4. Meanwhile, prepare the filling by combining the sugars, cinnamon and pumpkin pie spice in a small bowl. Set aside.
5. Transfer the risen dough to a floured surface and roll into a 16"x 12" rectangle. Spread butter and pumpkin over dough. Sprinkle with sugar mixture. Roll into log and cut into 15 slices using a sharp knife or dental floss. Place slices into a 9x13 or two 8 or 9 inch round cake or pie pans. Cover with a towel and let rise until almost doubled, about 45 minutes.
6. Preheat oven to 375 degrees. Bake the for 20-25 minutes or until rolls are golden brown (don't worry if the filling rises and bubbles, it will go down once the rolls have been removed from the oven).
7. While rolls are baking, prepare frosting by beating the cream cheese, butter, vanilla, salt and lemon juice in a medium mixing bowl until smooth. Add the powdered sugar one half cup at a time. If the mixture becomes too thick, slowly add milk one half tablespoon at a time.
8. Remove rolls from oven and let cool on wire rack. Frost 5-10 minutes after removal.
Recipe adapted from King Arthur Flour and bakedbree | Makes approximately 12-16 rolls

Hello, fall! Hello, pumpkin!

2

Friday, October 14, 2011

So as you can probably tell, I'm just a little excited for fall. My Pinterest account can attest to that. But for some reason I've been holding back on making pumpkin goods. There have been two cans of pumpkin sitting in my pantry for weeks now and I've done nothing but stare at them. I think it has something to do with the fact that I want to make everything I see that has pumpkin in it, and because I can't, I haven't made anything at all. But....... that all changed last night. With a Relief Society dinner fast approaching I finally caved. I decided that I would go ahead and make not one, but two desserts. First on the list was cheesecake. Do you remember how I attempted to make that raspberry white chocolate one a couple of months ago? Maybe not. Hopefully not. I know I'd rather not remember, but thankfully I figured out where I went wrong. Anyway, instead of relying on a recipe I had bookmarked in my KitchenAid cookbook, I decided to be really brave and make my own. And guess what? It turned out REALLY good! I'm just a little proud ;) Unfortunately since I had to take it to the dinner, I never got a picture of the inside. So all you get is the before and after. What can I say? A picture is worth a thousand words. (P.S. the recipes below are 4x6, so all you have to do is print them!)


For the second dessert I made pumpkin cupcakes. I have been seeing a lot of recipes on blogs and websites for cupcakes, but again, I decided to create my own. And yet again, another success! My only suggestion is to store these in the refrigerator (because of the cream cheese) and to add extra powdered sugar to the frosting if you're planning on piping it like I did... it helps keep things in place.


Homemade Tomato Soup

0

Thursday, October 13, 2011


I've been making a lot of soups lately... wishful thinking perhaps? The weather is still warm out but it has been raining a lot, so maybe that's what has put me in such a big soup mood. Last night I made a Zupas inspired tomato basil with orzo soup and broiled some sourdough bread with cheddar to go along with it- yum!

Creamy Tomato Basil Soup
Ingredients
1 tbsp. reserved oil from sun-dried tomatoes or olive oil
1/2 medium onion, chopped
1/2 c. carrot, grated finely
3 cloves garlic, minced
2/3 c. sun-dried tomatoes packed in oil
2 1/2 c. canned diced tomatoes
3/4 c. chicken broth
1 (10 3/4 oz.) can tomato soup
1 tsp. sugar
1/2 tsp. salt
1/4 tsp. freshly ground pepper
1/2 tsp. dried oregano
1/2 tsp. dried basil, 1/2 tsp. fresh basil (I use Gourmet Garden tubes found in the produce section)
1/4 tsp. red pepper flakes (optional)
3 oz. cream cheese (full or reduced fat), cubed
2 tbsp. whole milk or half and half

1/4 c. freshly grated parmesan for garnish
2 c. cooked orzo pasta

DIRECTIONS:
1. Place oil in a large skillet or pot over medium-low heat. Add onion, carrot and garlic. Cook for 4-5 minutes or until vegetables are tender, stirring often.
2. Add sun-dried tomatoes, canned tomatoes, tomato soup, chicken broth, sugar, salt, pepper, oregano, basil and red pepper flakes. Bring soup to a boil for 2-3 minutes, then reduce heat and simmer for 30 minutes.
3. Remove soup from heat. Transfer soup to a blender. Add cream cheese and whole milk or half and half. Remove center piece from blender to allow steam to escape. Cover with a paper towel to prevent splatters. Process for a few minutes until smooth, making sure the soup is creamy (I would pulse it for at least 2-3 minutes in order to avoid it being chunky- trust me!).
4. Return mixture to stove and heat for 5 minutes. Add additional salt and pepper to taste. Place two large spoonfuls or orzo pasta in bottom of individual bowls. Ladle soup over and garnish with parmesan.


Hot & spicy, warm & cozy.

0

Saturday, October 8, 2011

Photo courtesy of thepioneerwoman.com

Last night I was looking for something to make that was quick and filling. I've been wanting to try the Pioneer Woman's Corn Chowder with Chilies for a long time, so with all the ingredients on hand, I did, and it was really good! I will say that it's got some heat to it, so if you're not a fan of spicy soups, go easy on the chipotle chilies. Other than that, it was the perfect meal for a rainy night and it cooked up in less than 30 minutes. A great addition to the soup would be chunks of potato- also some extra bacon :) If you're wanting to make it lighter, substitute the heavy cream for whole milk and add extra corn meal to thicken the base.

I'm currently

0

Friday, October 7, 2011

 baking from these:
1. Taste of Home Fall Baking
Get it! I has a lot of really good recipes and tips in it.
2. Food Network Fall Magazine-
It's got a lot of really good quick meals in it as well as several little pamphlets
featuring ways to cook/prepare certain vegetables.
3. KitchenAid Best Loved Recipes-
I found this at a bargain book sale at the BYU Bookstore a year or so ago and I finally
cracked it open. Now that I have a KitchenAid, I've been trying out all sorts of things from it.

and loving these:
1. Walking day trip backpack from Modcloth via Beso
2. Modal plain tights in ochre via ASOS
3. Caslon stripe button shoulder sweater via Nordstrom
4. Heritage raincoat via Anthropologie
5. Kendzior leather oxfords via Aldo

PS... 
If you've never checked out ASOS, you really should (above is their website)...
...especially if you need style advice or want to keep up with the latest trends.
+ they've got a huge variety of clothes, jewelry and accessories.

Cookies & Cream Ice Cream

8

Tuesday, October 4, 2011


Stephen and I were talking about which ice cream to make the other day and one of the only kinds we could agree on was cookies and cream. I told him I'd make it as long as he would at least try some of the ones I would make in the future. So here we have it! I will say that I bought 2 little 6 packs of Oreos at the check-out because I figured they'd be enough, but after making the ice cream and adding the cookies, I tossed it in the freezer and headed to the store to buy some more. Embarrassing, I know, but I figured we'd both be disappointed unless there were more- it's kind of like going to get a milkshake and they give you a spoonful of Oreos instead of a handful... you know what I mean? So if you're totally freaked out by the fact that this has 18 Oreos in it, don't worry, you can add as many or as few as you'd like.

Cookies and Cream Ice Cream
Ingredients
1 c. whole milk
3/4 c. granulated sugar
2 c. heavy cream
1/4 tsp. salt
1 vanilla bean, split in half lengthwise or 1/2 tsp. ground vanilla bean
6 large egg yolks
1 tsp. vanilla extract
16-18 Oreo cookies, chopped

DIRECTIONS:
1. Warm the milk, salt, sugar and 1 c. of cream in a medium sauce pan. Scrape the seeds from the vanilla bean or add the ground vanilla bean to the warm milk. Cover and keep on low heat (just enough to keep warm) for 30 minutes.
2. Pour the remaining 1 c. of cream into a large mixing bowl and place a mesh sieve on top.
3. In a separate medium mixing bowl, whisk together the egg yolks. Slowly pour the warm milk mixture into the yolks, whisking constantly. After combined, scrape the mixture back into the saucepan and return to medium heat. Using a heatproof spatula, scrape the bottom as you stir, until the mixture coats the bottom of the spatula and/or reaches 170 degrees.
4. Pour the heated mixture through the strainer and into the cream. Add the vanilla extract.
5. Place over an ice bath to cool, then place in refrigerator for 30 minutes until chilled throughout.
6. Freeze according to manufacturer's instructions. When finished churning, stir in cookies with spatula.
7. Place in a air-tight freezer safe container and freeze for at least 4 hours.

Silkscreening Romney

0

Monday, October 3, 2011


In between school/studying, Stephen has been working on some Romney shirts for our friends.
This is the first one he's made using a different method (just stencils & a screen, no Yudu) and with Speedball ink (a lot higher quality than the previous ones he's worked with). 


Cookie dough 101

1

Sunday, October 2, 2011


Usually I have two plain dough recipes that I turn to when I make cookies. One is my mom's "Mrs. Fields" recipe (which includes oats) and the other is Stephen's mom's "Toll House" recipe. But the other day I made cookies for Stephen before he got home from school and used a new recipe. It produced cookies that were was thick, chewy and delicious. It does however, require a little more attention during the baking process, but I think overall it's a really great addition to my collection- not to mention it's the perfect base for any type of cookie, whether it be your standard chocolate chip or mini M&M and toffee butterscotch.

Thick and Chewy Cookie Dough
Ingredients
2 c. all-purpose flour
1/2 tsp. baking soda
1/2 tsp. salt
12 tbsp. unsalted butter, room temperature (1 1/2 sticks)
1 c. brown sugar
1/2 c. granulated sugar
1 large egg, plus 1 egg yolk
2 tsp. vanilla

DIRECTIONS:
1. Preheat oven to 325 degrees and line 2 cookie sheets with parchment paper.
2. Whisk flour, salt and baking soda together in a medium bowl, set aside.
3. In a large mixing bowl, cream butter and sugars together until thoroughly combined. Beat in yolk, then egg. Add vanilla and continue to beat until combined.
4. On low speed, add dry ingredients a little at a time until combined.
5. Stir in mix-ins (chips, candies, nuts etc.)
6. Scoop onto lined baking sheet and place in oven. Halfway through baking (7 or 8 minutes) rotate sheet. Set time for 7 more minutes. Remove cookies once edges are golden brown and centers are soft and puffy. Do not over bake.  [total baking time will range anywhere from 12-16 minutes because of slightly cooler oven temperature]
7. Let cookies cool on sheet for 5 minutes. Transfer to wire rack to cool completely.

(recipe adapted from Baking Illustrated)

Fall {GIVEAWAY} Update 10/1

0

Saturday, October 1, 2011


Congrats to our winner below!
please email me {nataliedicks@gmail.com}
your address in order to claim your items!
Thanks to all who entered!

Courtney said...

Life Made Simple All rights reserved © Blog Milk - Powered by Blogger